Transactional Emails
UI basics for emails
To craft the layout and view of the email, we use a framework called react-email to do this.
This gives us a few benefits:
- We can use "react like" syntax in the backend
- Allows us to preview the emails before we ship them
nx email api-journeys- go to
localhost:4601to view the preview environment - you can also run
nx email api-usersto see our other email templates
- Gives us premade react components that are supported by most email clients
- Allows us to use TailwindCSS to style components as it isn't dependent on 'client-side-only' react hooks
CSS properties not supported in email clients
Most CSS3 properties are not supported in email clients. Please visit https://www.caniemail.com/ to check if the CSS property you are trying to use is supported.
some common CSS properties that are not supported by email clients:
- flexbox
- grid
- position
- auto margins
- negative margins
- auto paddings
- border-radius
- max-width
- min-width
- box-shadow
how to center a div in emails
without use of these commonly used css properties, it can be quite challenging to align items centrally. However, react-emails gives us some components we can use that can achieve this:
            <Section>
              <Row>
                <Column align="center">
                  <div/>
                </Column>
              </Row>
            </Section>
this transpiles to the following html:
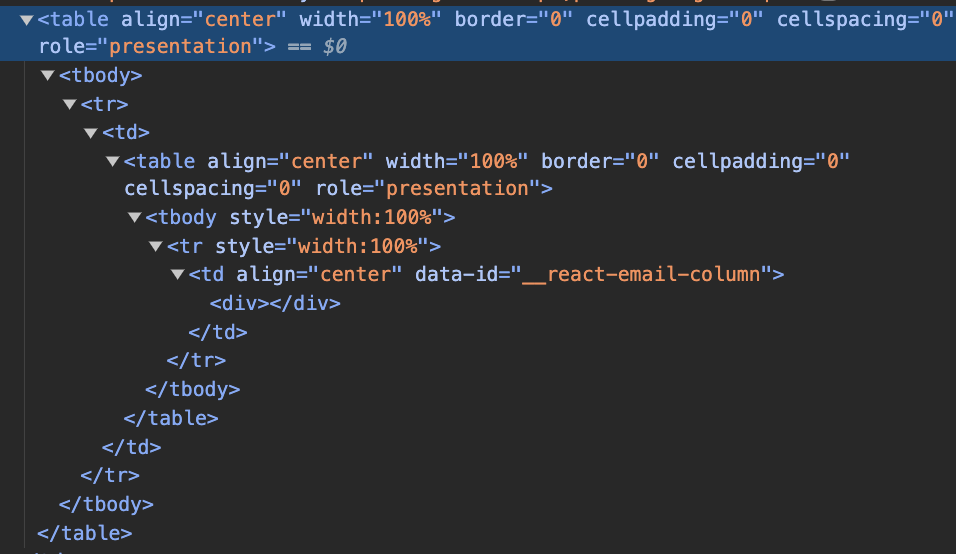
As you can see, under the hood the layout of emails is set by table, table headers, table rows and table columns. This is helpful in making sure content layout is consistent across all email clients.
For more react-email components, see: https://react.email/docs/components/html
How do I know if my email is getting sent?
- In the local environment, we use the nestjs mailer module
- In prod and stage, we use amazon SES.
Since in prod and stage you can just login to your email client and check if it has been sent to your inbox, we will only cover the local environment.
- Make sure servers are running
nf start
- Go to the journeys-admin locally and perform the actions that will send an email.
- Go to
http://localhost:1080/and see if the email is visible here.
Creating fake accounts
With the addition of signup verification. It can be quite difficult to create an account with a fake email address for testing purposes. Thankfully, we can use email aliases to solve this.
for example, if your email address is:
someemail@gmail.com
then you can add an alias to it by appending +<number>, e.g.: someemail+1@gmail.com
This will still send an email to the inbox of someemail@gmail.com so that you can copmplete the verification process, but mock a new user signup.
Adding emails to the queue
In our backend, we use redis and bullmq to create a job - that at a later time, will get processed and once complete, send an email to user.
The email worker lives in apis/api-journeys/src/workers/email/:
config.ts— defines the queue name (api-journeys-email) and job namequeue.ts— exports the BullMQQueueinstanceservice/service.ts— the worker that processes jobs and sends the email
To enqueue an email from a mutation, import the queue and add a job:
import { queue } from '../../workers/email/queue'

await queue.add(
  jobName,
  { someData, email },
  {
    removeOnComplete: true,
    removeOnFail: { age: 24 * 3600 } // keep up to 24 hours
  }
)
The worker's service then assembles the data and renders the template with react-email:
import { render } from '@react-email/render'

const html = await render(SomeJobTemplate({ email, someData }))
const text = await render(SomeJobTemplate({ email, someData }), {
  plainText: true
})

await sendEmail({ to: email, subject: 'some title', html, text })
Add a spec file alongside the service to cover the new job type.